Receiptmakerly’s live receipt builder lets you customize a receipt and see your changes as you make them. Add your business and transaction details, check the live preview, and download the finished receipt as a PDF or PNG.
This guide uses the Walmart Receipt template to show you how it works. You can follow the same process with other templates, although the fields and editing sections vary depending on the receipt you choose.
Before you start
Have your business name, address, transaction date, payment details, and amounts ready. If your chosen template supports a logo, have the image ready too.
Let's get started to create your first receipt:
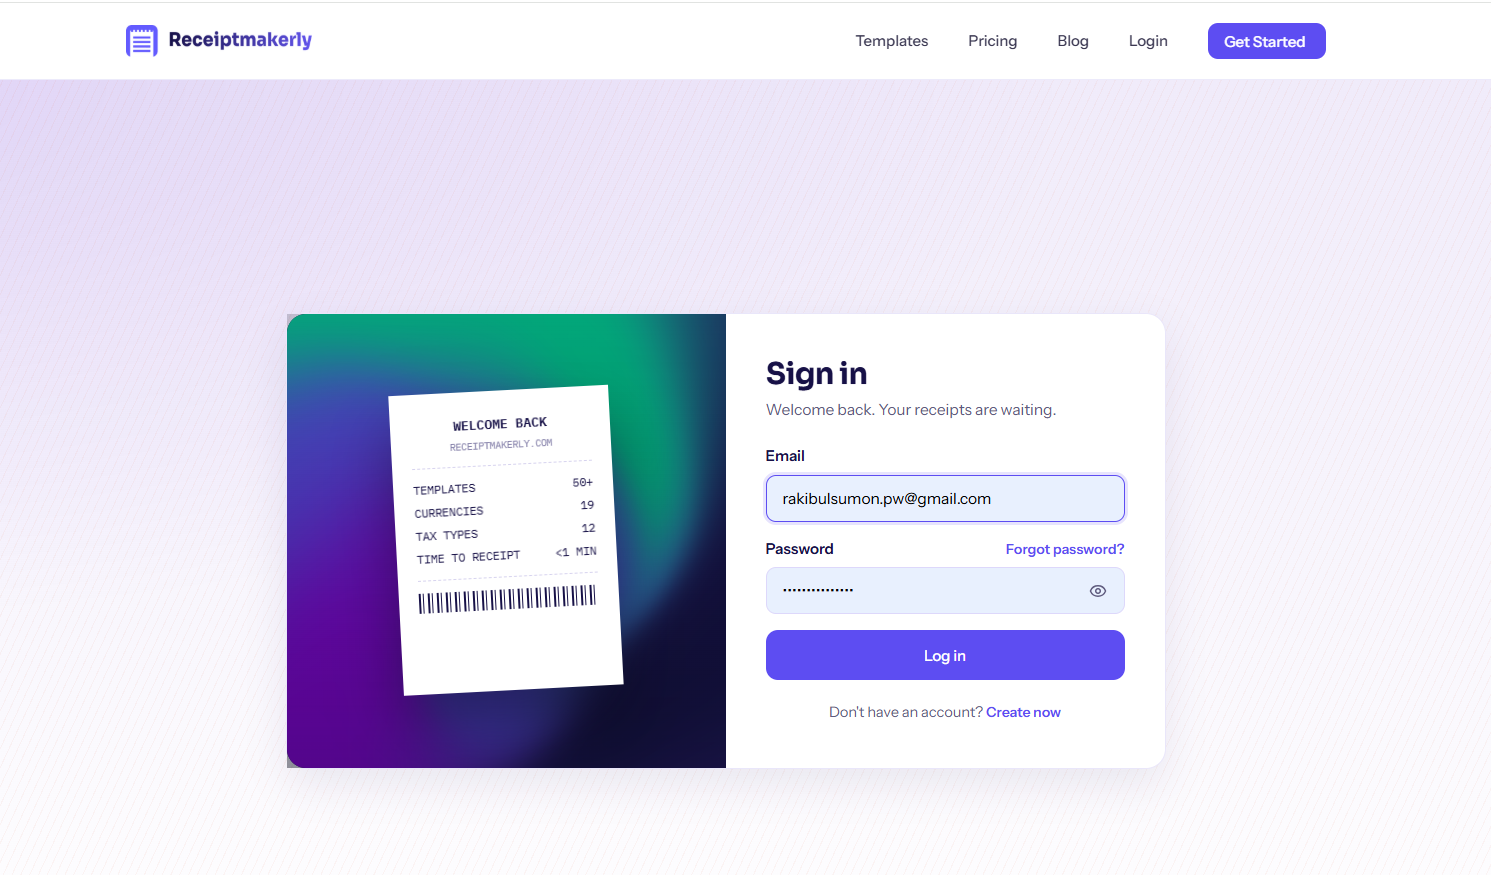
1. Login to Your Account
If you have already subscribed to any plan, you have received the credentials in your email. With the credentials you have, please sign in to Receiptmakerly.com
2. Choose a receipt template
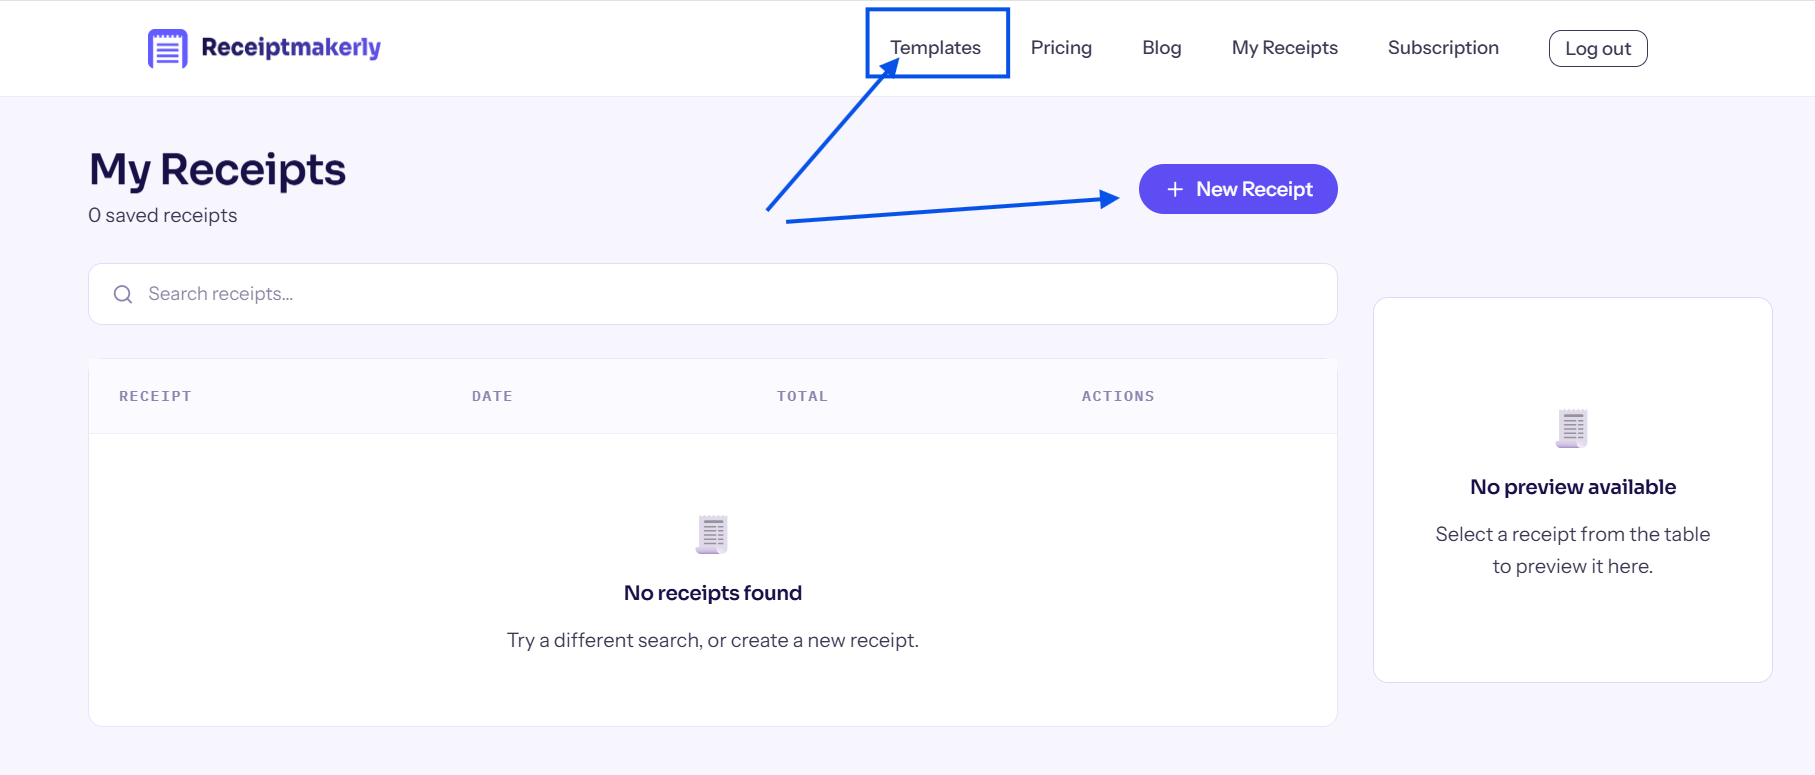
After successfully login, you will be landed on your dashboard.
a. To choose any template to create the receipt, click the New Receipt button or the Templates menu on the header.
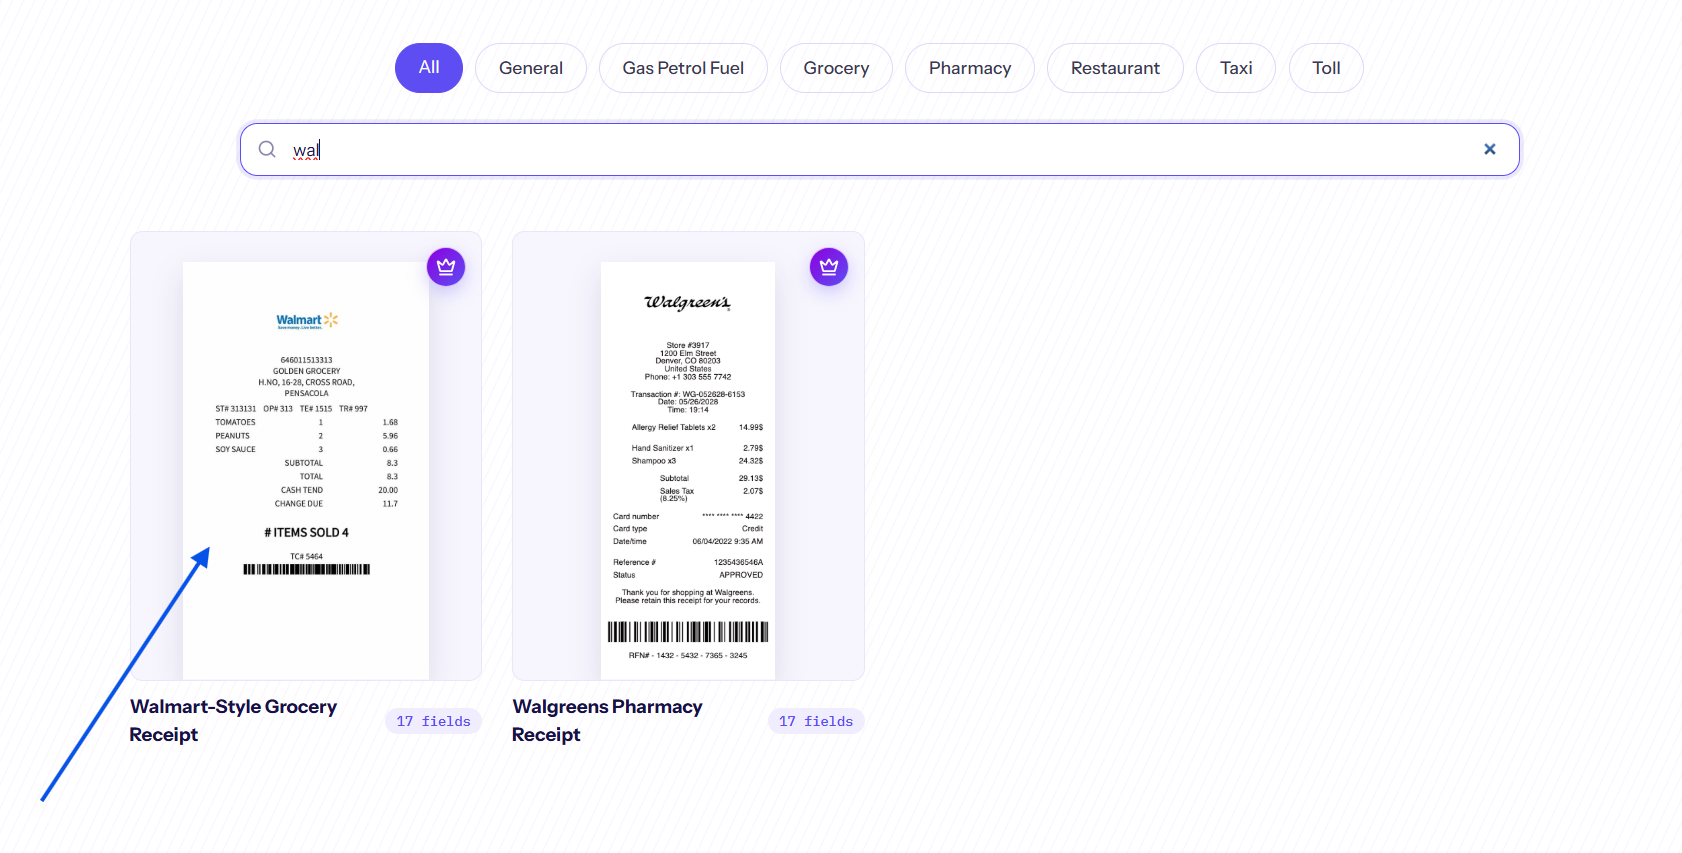
b. Browse by category or write any Receipt name on the search field to find a specific template. We are choosing a Walmart receipt here.You can choose another template if it better fits your transaction.
3. Get familiar with the live receipt builder
When you open this template, you’ll see editing sections alongside a live receipt preview.
Select a section on the left side editor to enter or change your information. The preview updates as you edit, so you can see how your details appear on the receipt while you work.
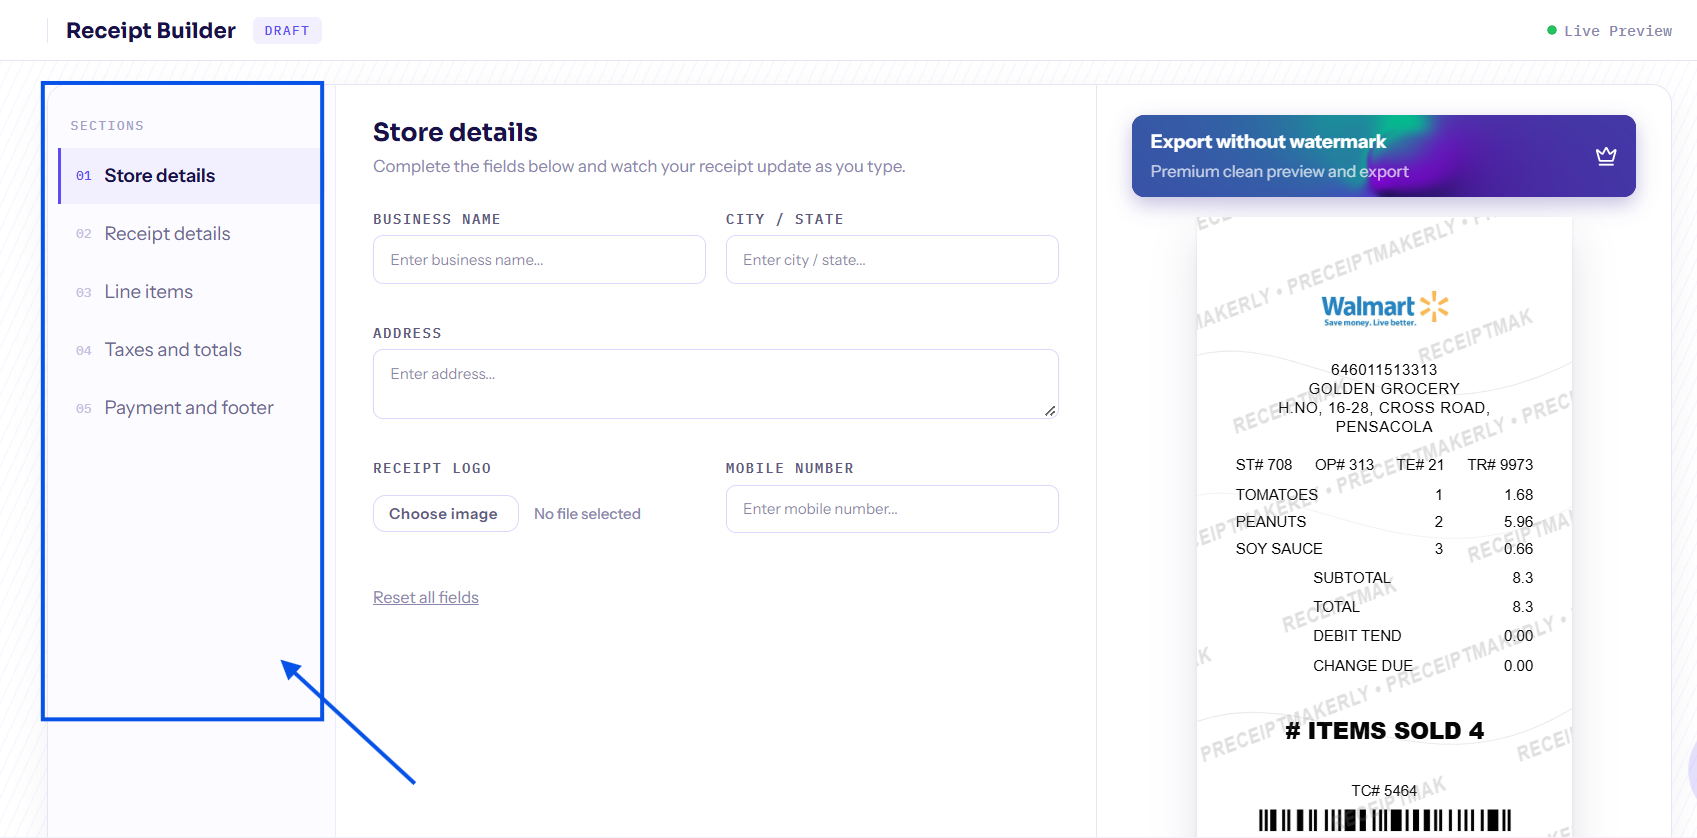
The Walmart Receipt builder includes:
- Store details
- Receipt details
- Line items
- Taxes and totals
- Payment and footer
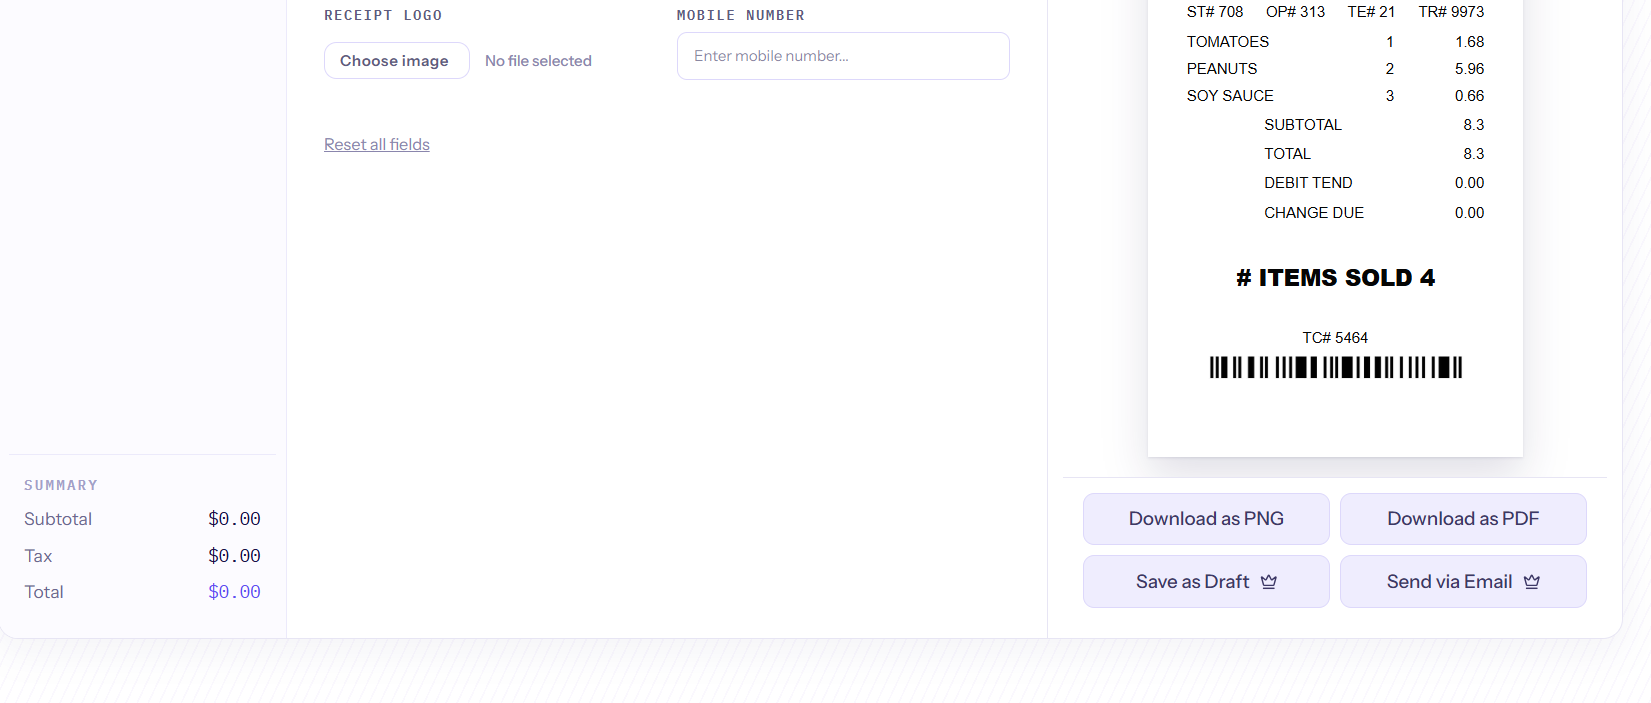
Below the preview, you’ll find controls to download the receipt, save it as a draft, or send it by email.
Other templates may have different sections and fields. Complete the fields provided by your chosen template.
4. Add your business details
Open Store details and enter:
- Business name
- City / state
- Address
- Receipt logo
- Mobile number
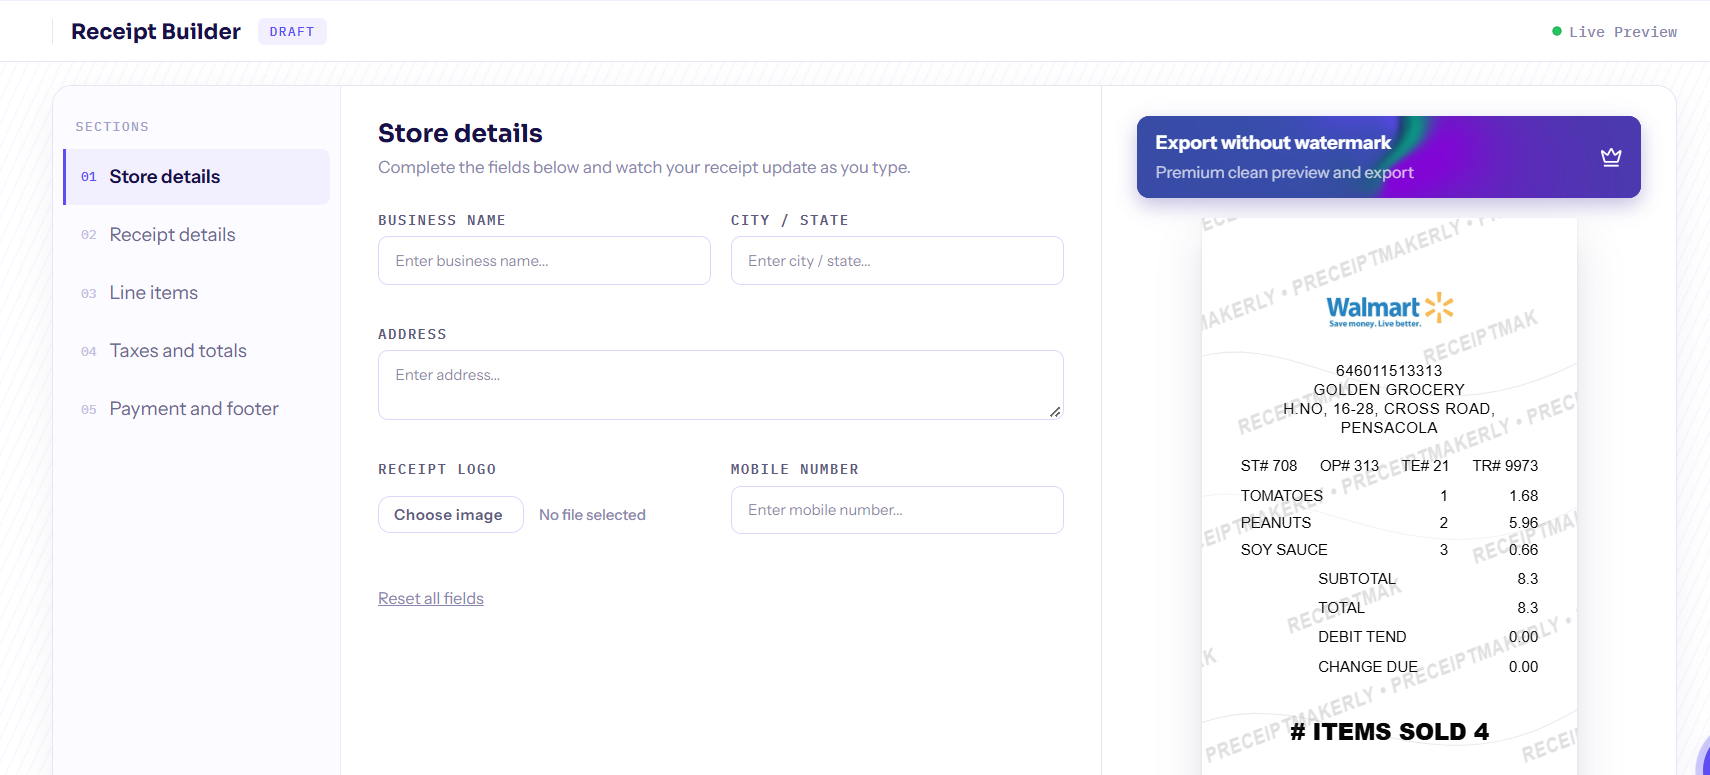
Depending on your template, you may or may not see fields for country, postal code, or a logo upload.
5. Enter your receipt details
Open Receipt details and set:
- the date,
- time, and
- currency to match your transaction.
Complete the other reference fields that apply i.e., ST No, OP No, TE No, TRN No and choose a font style if you want a different font style.
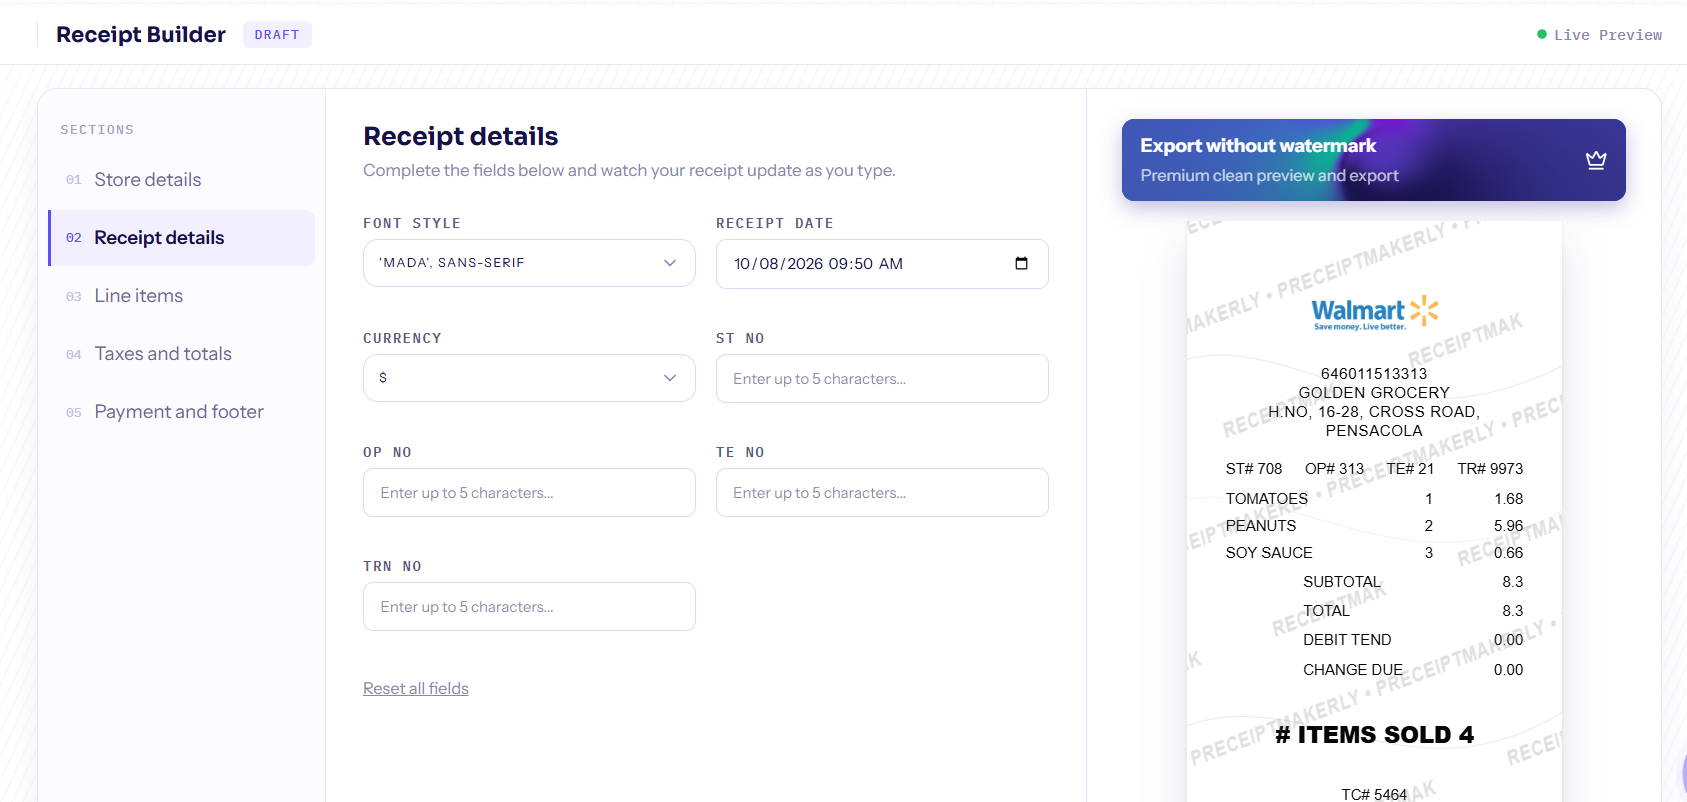
The information requested depends on the template. Some receipts include a receipt number or transaction reference; a fuel receipt may include litres and price per litre.
As you enter your details, check the live preview and replace sample information where needed.
6. Add line items
Now input line items, their
- Quantity,
- Unit price and
- Amount.
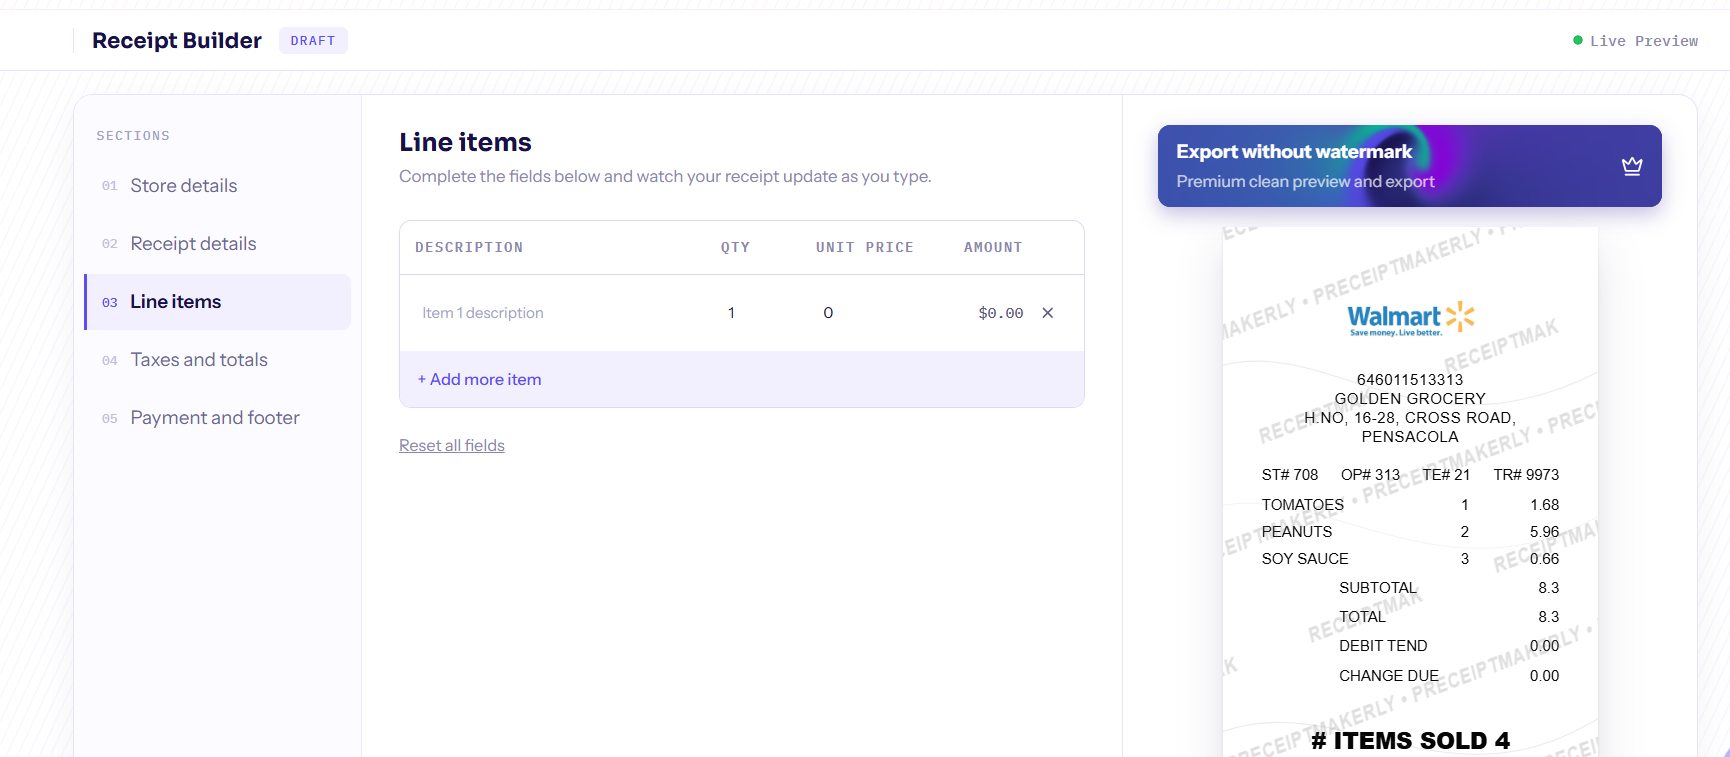
The amount will be auto calculated on your receipt.
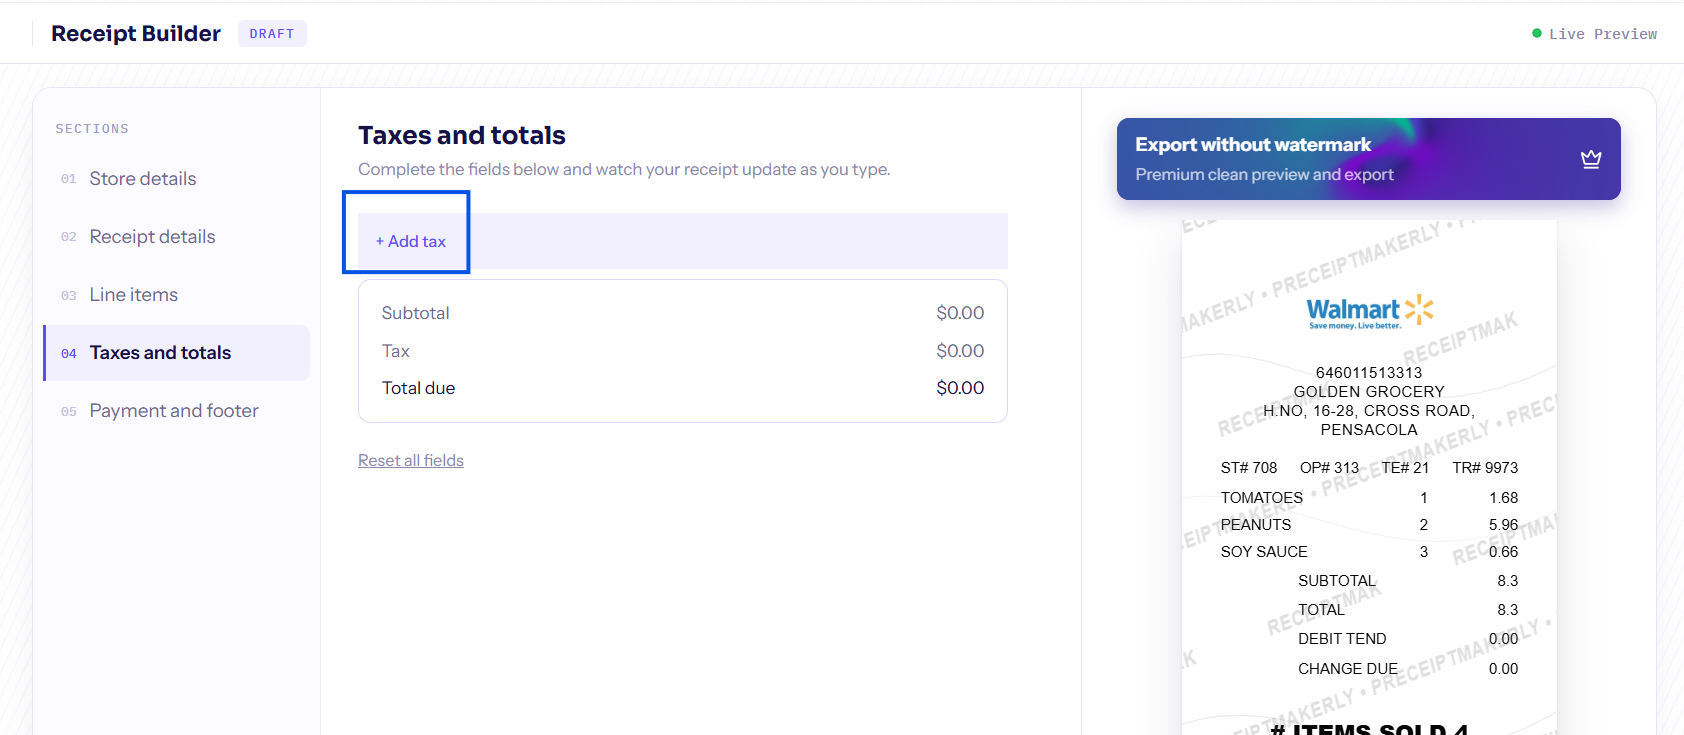
7. Add taxes and totals
Walmart requires tax details. So, open Taxes and totals, select + Add tax, and enter the tax label and rate.
For example, a subtotal of $509.00 with a 10% tax rate should produce $50.90 in tax and a $559.90 total.
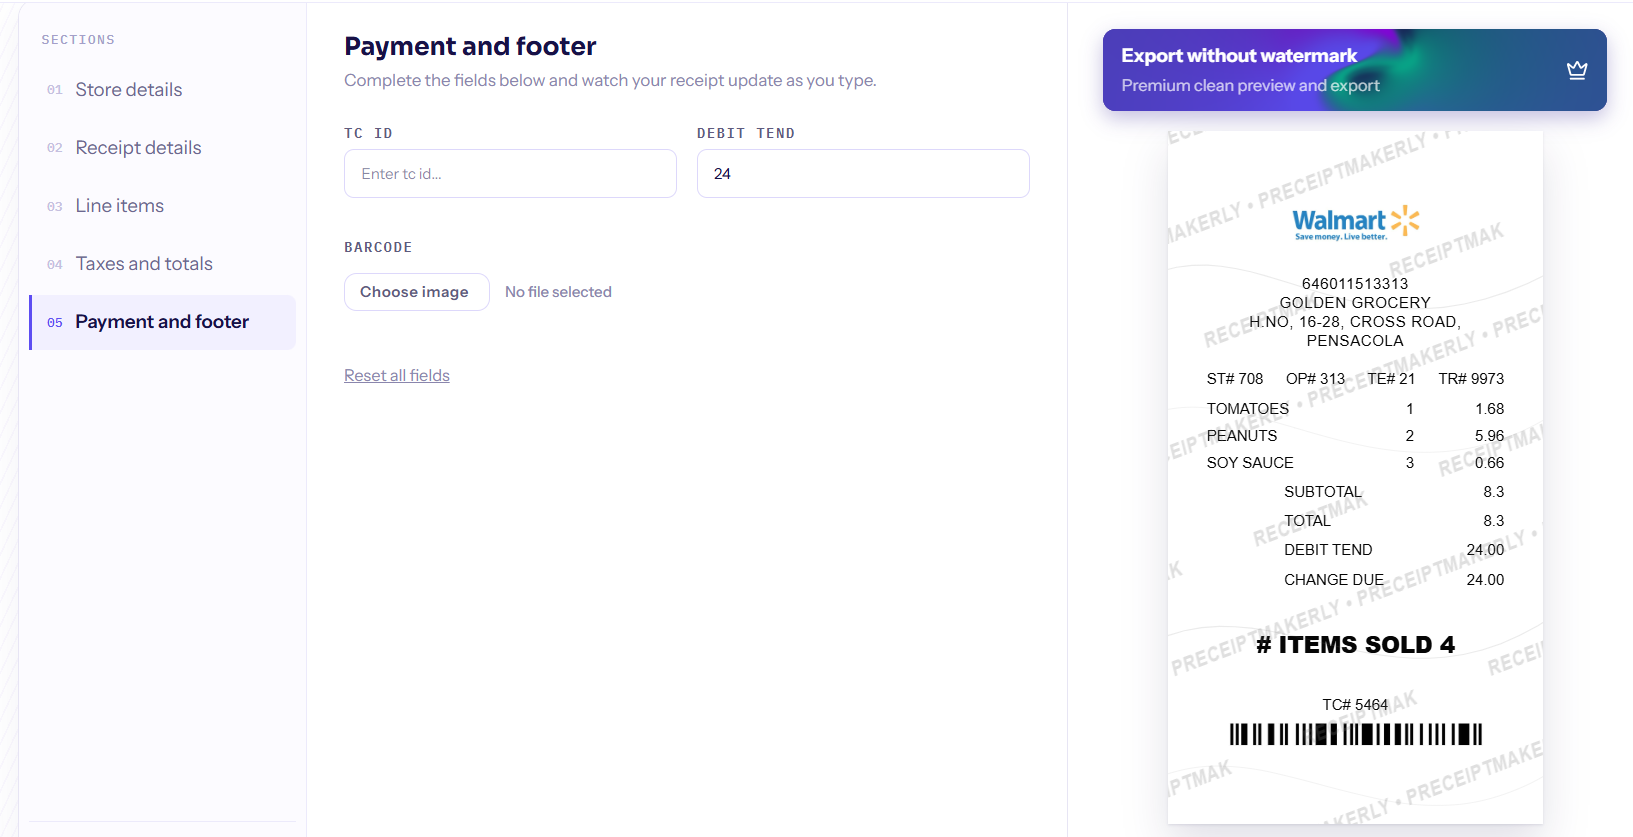
8. Payment and footer
Add additional details i.e., TC id, Debit tend, Barcode to the receipts
9. Review your receipt in the live preview
We have added the required details to the receipt. Now, before downloading, check that:
- Your business name and address are correct.
- The date, time, and currency match the transaction.
- Transaction references and payment details are accurate.
- The amounts, taxes, and total are correct.Sample information has been replaced where needed.
To make a correction, return to the relevant editing section. Your changes will appear in the live preview.
10. Remove the watermark and download
If you find that all the details you input are correct, then it's time to download the receipt. Receiptmakerly users can download their receipts without watermark.
a. To remove the watermark, click the Export without watermark on top of the receipt.
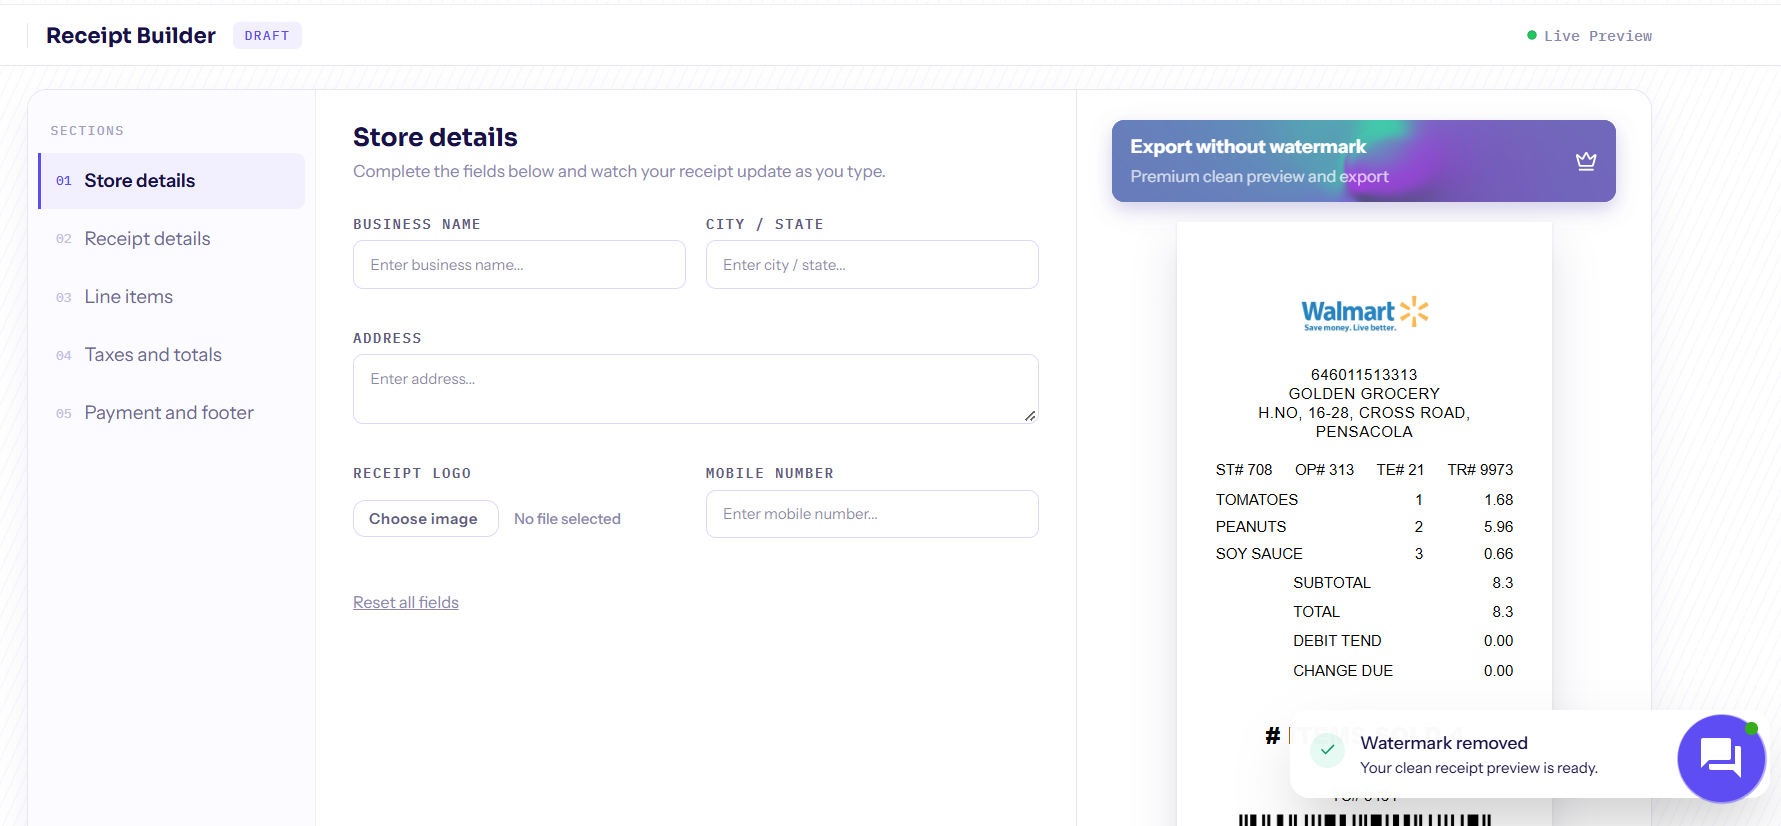
b. Once the watermark get removed, select a format below the preview section to download:
- Download as PDF for a document copy suitable for printing and keeping with your records.
- Download as PNG for an image copy.
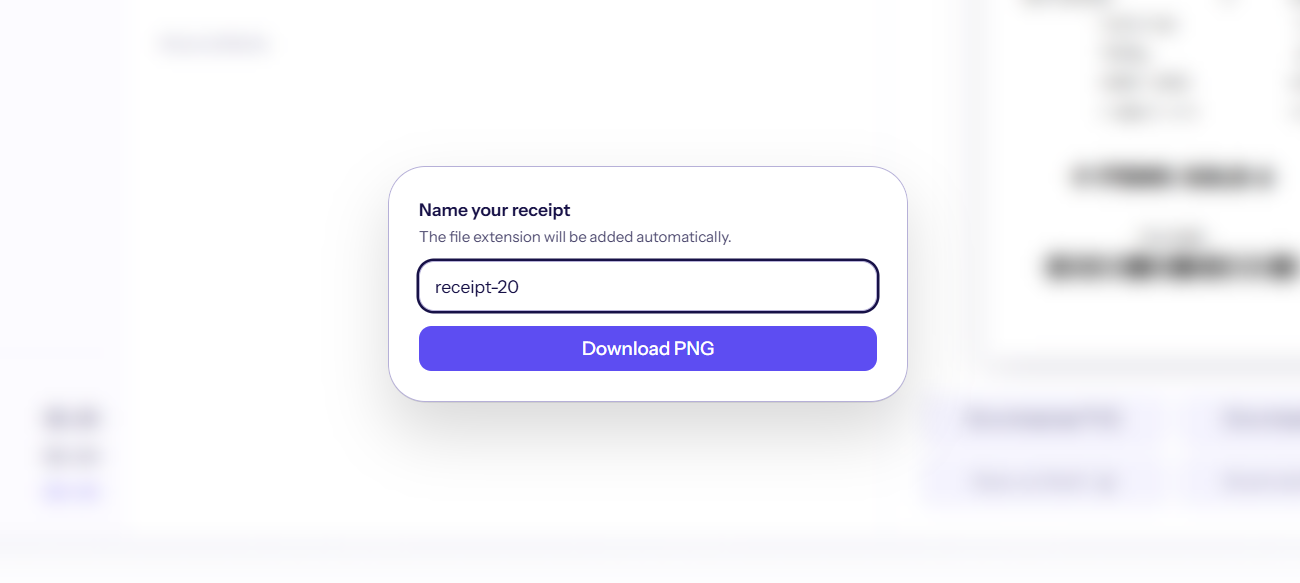
c. When you click on any format a modal opens. Enter your preferred file name when prompted, then click the Download button.
11. Save your receipt for later or reuse it
To save it, click the Save as Draft button below the receipt.
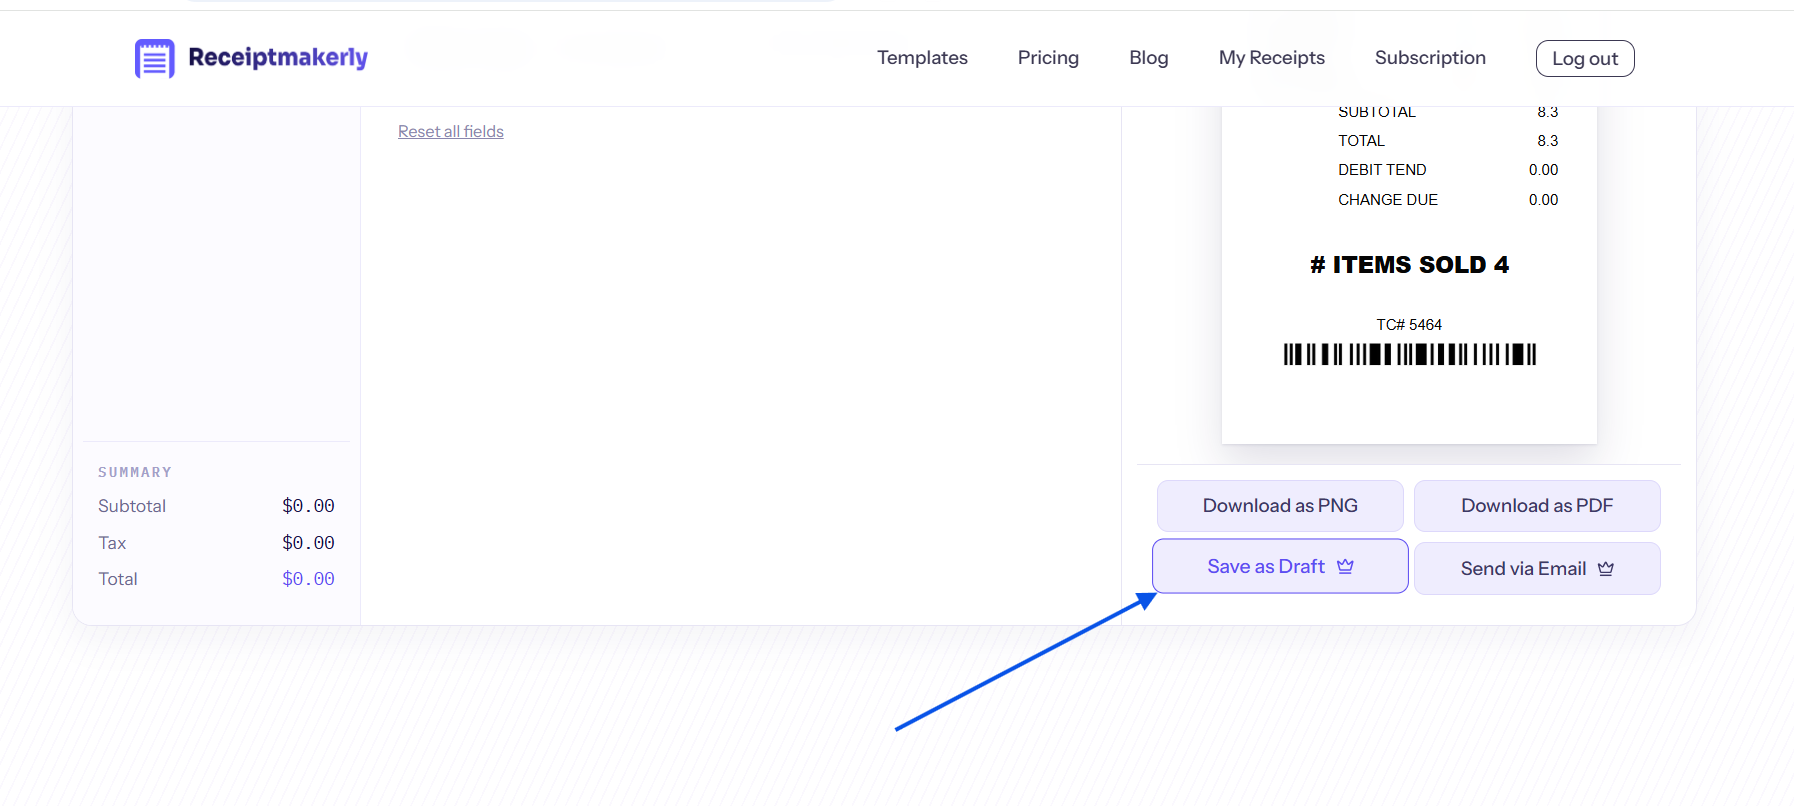
You can use it to save a receipt you want to finish later, or keep your customization to reuse as a custom template for future receipts.
12. Send your receipt by email
Receiptmakerly also offers subscribers to send their receipts via email to any email address, whether their own or to their customers email.
After reviewing the receipt, if you want to send your receipt via email, select “Send via Email” and complete the email details requested on screen.
Frequently asked questions
Can I create a receipt without signing up?
Yes. You can customize and download free receipts without a watermark, or premium receipts with a watermark, without signing up.
Can I see my receipt while customizing it?
Yes. The live receipt preview updates as you edit the builder fields, letting you check the receipt throughout the process.
Why does my receipt have different fields from this guide?
Each template has fields suited to its receipt type. This guide demonstrates the general workflow using Simple Receipt; your chosen template may have different sections or details.
Do I need a subscription to remove the watermark?
Yes, you need to subscribe to remove the watermark.
Can I save my customization as a custom template?
Yes. Premium subscribers can save their custom receipt as draft to keep their customization for reuse or return to edit the receipt later. This works with both free and premium receipts.
Start creating your receipt
So why wait! Just choose a template, customize it with the live receipt builder, and download your finished receipt.
Use Receiptmakerly to create polished, export-ready receipts in minutes.